Hollow Knight Papercraft Assembly Instructions

The Knight

- Carefully punch out all pieces. 0:04
- Fold all creases crisply. 0:15
- Insert Tab A into Slot A to form BODY. 0:29
- Insert Tab B into Slot B to form CLOAK. 0:36
- Place CLOAK over BODY and fold Tabs C into BODY between Tabs D and E. 0:42
- Insert Tabs D and E into Slots on HEAD. 0:49
- Insert Tabs F-J into corresponding Slots to form HEAD. 0:56
- Fold HORNS forward. 1:08
- Insert NAIL into Slot on CLOAK. 1:15
Hornet

- Carefully punch out all pieces. 0:04
- Fold all creases crisply. 0:18
- Insert Tab A-D on LEGS into Slots A-D on BODY to attach. 0:29
- Fold sides of Tab E in, and insert into Slot E to form BODY. 0:39
- Fold HEAD in half outward and fold Tabs F and G behind. 0:44
- Insert Slots F and G into Slots F and G and attach HEAD to BODY. 0:50
- Bend COLLAR around neck and insert Tabs H into BODY while sliding Slot I into I to form COLLAR around neck. 1:01
- Insert Tab J on ARM into Slot J to attach. 1:13
- Slide BASE COVER over BASE print side up. 1:24


Quirrel

- Carefully punch out all pieces. 0:04
- Fold all creases crisply. 0:17
- Insert Tab A and B into Slots A and B to form front of BODY. 0:28
- Insert Tabs C-F into corresponding Slots to form back to back of BODY. 0:38
- Insert Tabs G and H on ARMS into Slots G and H to attach ARMS. 0:47
- Insert Tabs I and J into Slots I and J to form MASK. 0:54
- Fold Tabs on sides of LEGS inward to form LEGS. 1:00
- Place MASK on HEAD. 1:07
Grub
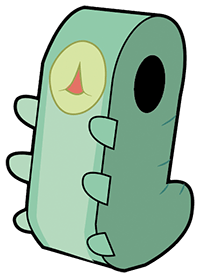
- Carefully punch out all pieces. 0:05
- Fold all creases crisply. 0:18
- Slide Slot A into Slot A. 0:28
- Insert Tabs B and C into Slots B and C to form bottom of BODY. 0:38
- Slide Slot D into Slot D. 0:47
- Fold Tabs E inside BODY. 0:51
- Bend bottom of BODY up and around, and insert Tabs F and G to form back end of BODY. 0:55
- Bend top of BODY around, and insert Tab H into Slot H to finish BODY. 1:10
- Insert LEGS into Slots on BODY. 1:19

- Papercraft patterns by Custom Papertoys and Makoto Koji
- Videos by Everdraed and Erika Sielski
